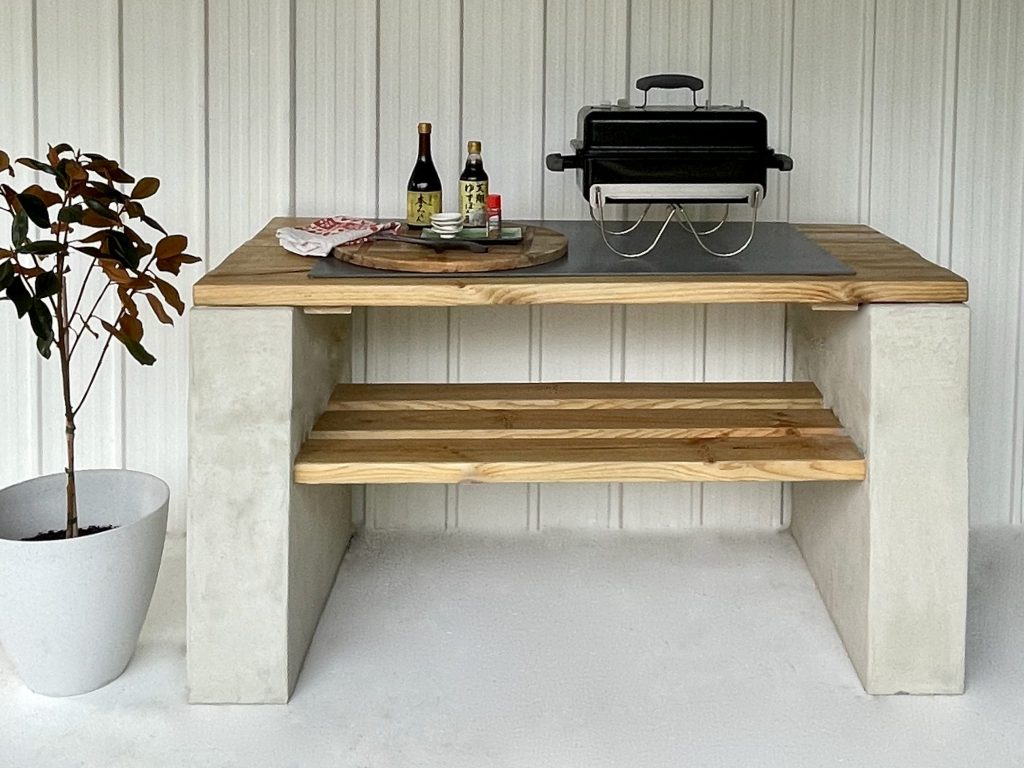
DIY specialist and renovator Natasha Dickins from Little Red Industries shows how to transform humble building materials into a solid customised bench.
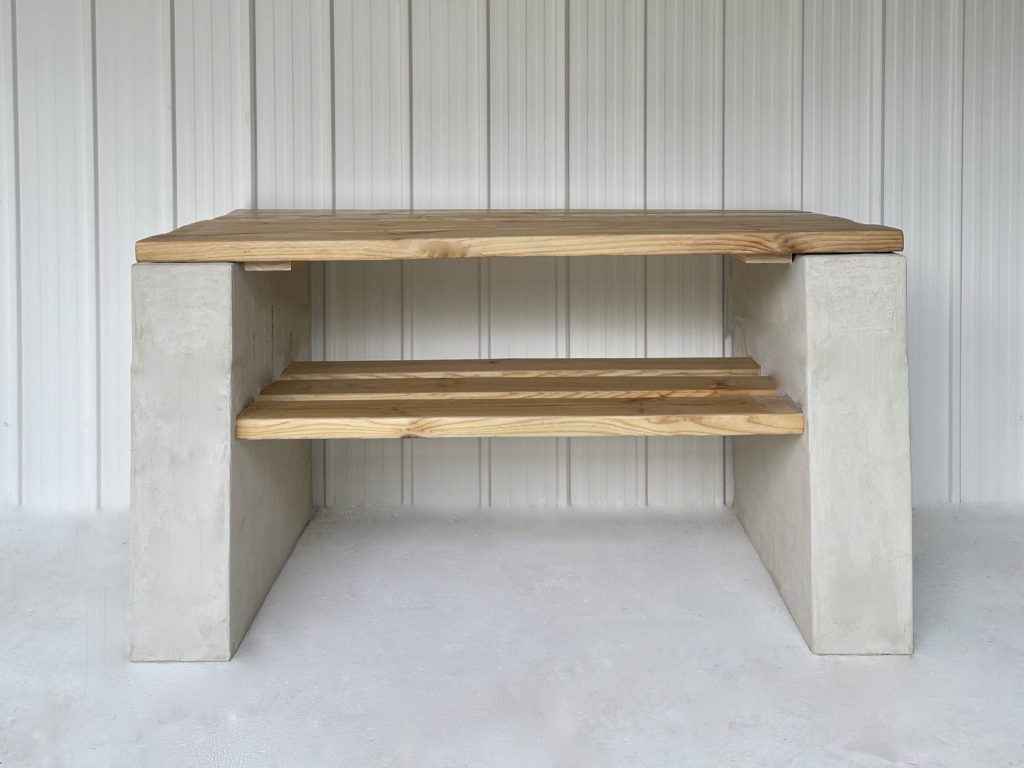
I built this sturdy bench by assembling rows of concrete besser blocks. They’re simply rendered then sealed in Bondall’s lovely Betta Tilecare Natural Look Sealer for a smooth, modern finish. Once the bench was finished, I added a fibre-cement sheet as a fire-retardant barrier to create a barbecuing area. It can simply be lifted off to change it from cooking table to DIY workbench. While the blocks are easy to move one at a time, the completed pillars are heavy, so I recommend building on site and over a concrete slab or well-embedded pavers. Watch the video to see how it turns out. To make the pillars, I set out four rows of 390mm x 190mm x 190mm besser blocks each side, ensuring they’re straight and perpendicular to the wall by taping an outline on the ground. There are two blocks in each row and the pillars end up just over 760mm high. The third row of blocks is positioned sideways to hold slats for the shelf, which is 1200mm wide. I secured them with landscaping adhesive that’s so tough nothing budges once it has cured.
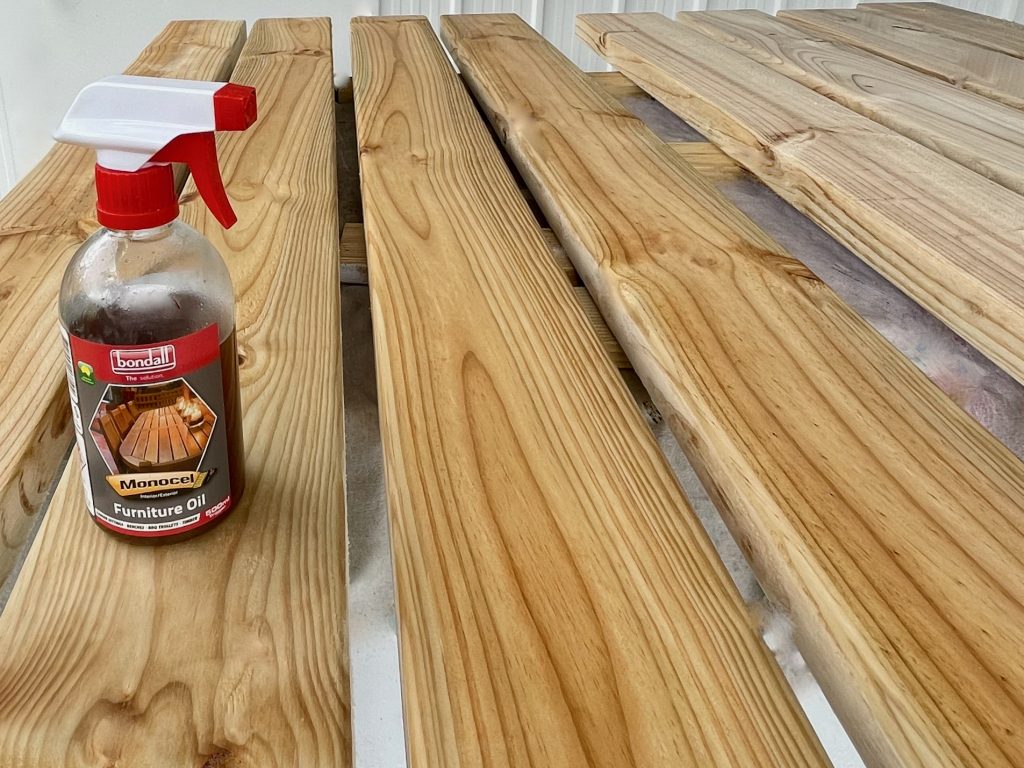
After trimming down 140mm x 45mm pine sleepers with a thicknesser, I cut them to be just under 1500mm long for the shelf and just over 1500mm for the top. I sealed the shelf slats in Monocel furniture oil, but the top is in marine-grade Monocel Gold varnish, which has a smoother finish that’s easier to wipe clean than the oiled surface.
I filled the block holes with expanding filler, leaving it to harden for about an hour, then used a mini hacksaw blade to cut away the cured foam and sanded the area smooth.
TIP Initially the foam is sticky and messy so leave it untouched to dry, but watch as it doubles in size and cures into a hard honeycomb-like substance.
Rending is the fun part! After taping around the slats and the floor, I combined the powdered render with water, then used a scraper with a 279mm rendering trowel to apply an even layer all over the pillars.
TIP Wear a mask to mix the powder into a toothpaste-like consistency. I used a basin-type bucket as it’s easier to get into, refilling it six times to complete the project.
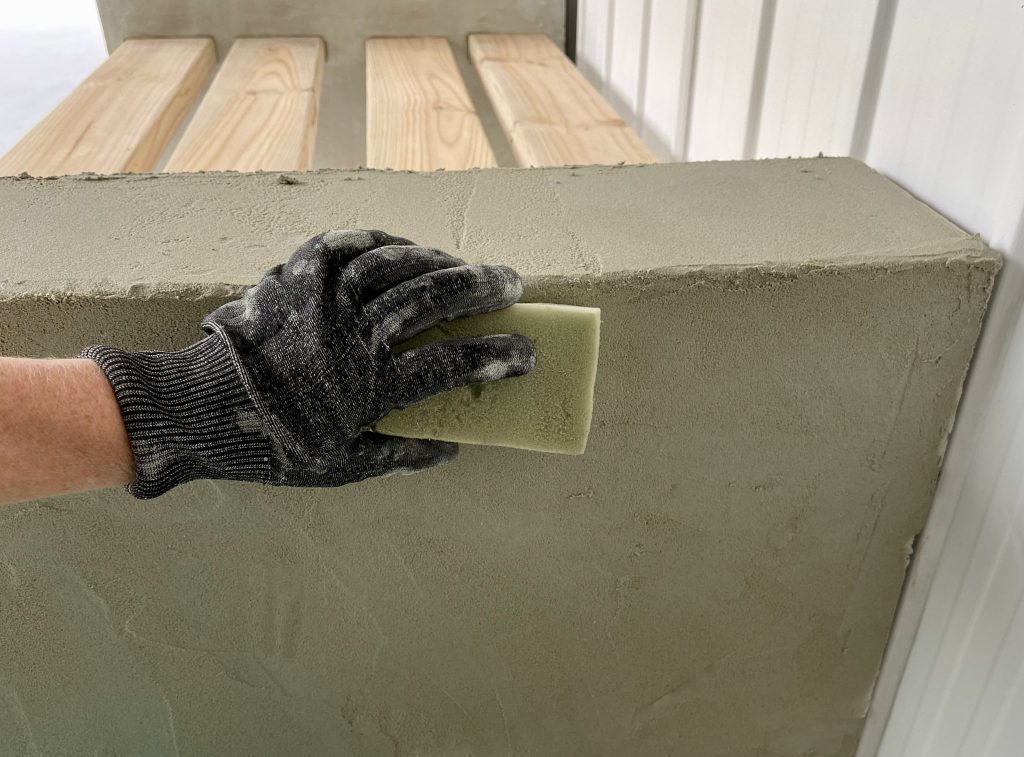
By the time I’d covered both pillars, washed the equipment and tidied up, the render had dried just enough for me to smooth over it with a damp sponge to remove trowel marks, clean up the edges and round-over the corners.
TIP Position a drop sheet on the ground, wear gloves and continually rinse out the sponge to remove the excess render, extracting as much water as possible before lightly rubbing over the surface.
The render took a couple of days to dry completely. I brushed it down to remove any loose sand and particles, then finished with two coats of Betta Tilecare Natural Look Sealer using a mini microfibre roller.
TIP The render lightens in colour as it dries, so wait for the entire surface to appear uniform before sealing.