
Fire Pit with Built-in Bench
Create a dedicated winter zone in the backyard with a built-in bench to cosy up to a fire pit.
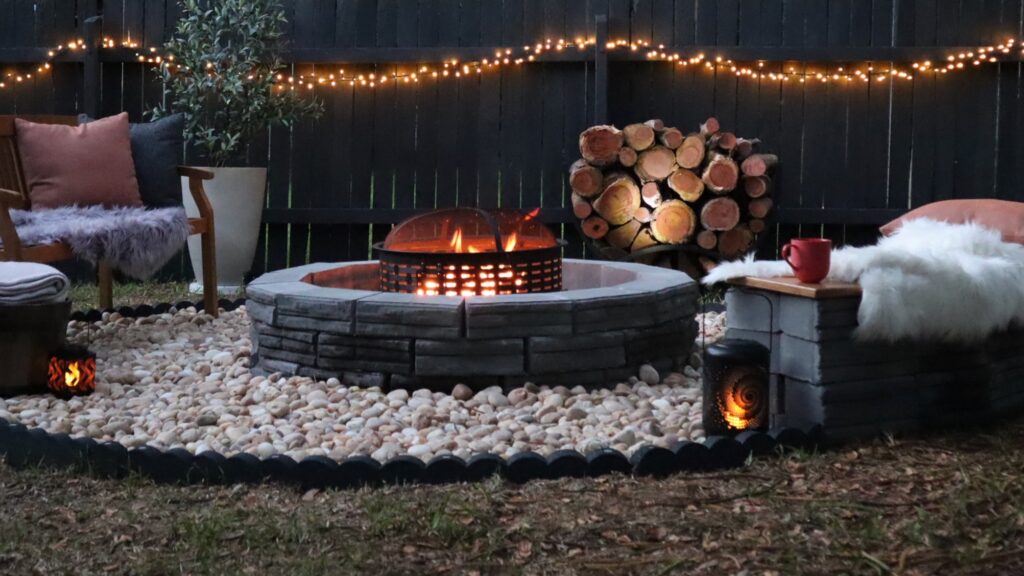
DIY specialist Natasha Dickins from Little Red Industries set out to make a safety surround for a store-bought fire pit and matching DIY seating that looks modern and inviting all year round.
I combined basic landscaping materials from Bunnings, using retaining wall blocks for the built-in structures and adding a seat made from marine plywood and finished in Monocel Gold Exterior in Clear for total weatherproofing.
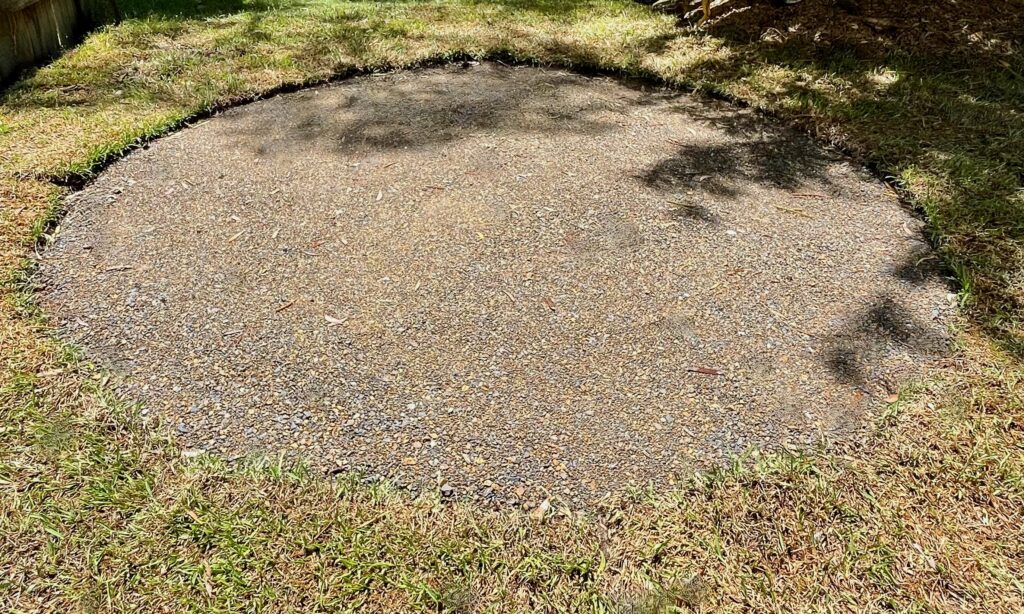
STEP 1
After clearing the area of foliage, I marked out a 4m-wide circle to compact with road base, then had top soil and turf brought in to lay around it.
TIP The area is positioned away from the fence and overhanging trees. Purchase the fire pit bowl first and check that you can meet the safety requirements before getting started.
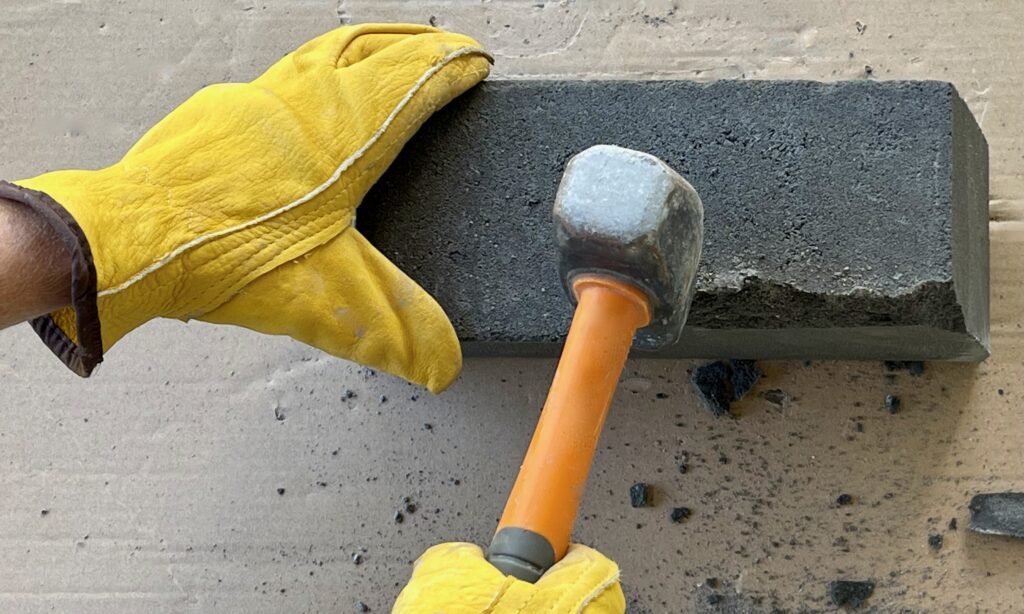
STEP 2
Natural Impressions blocks in Bluestone are designed to curve slightly and stack as inset rows of a retaining wall using a lip at the back to hold them in place. But I didn’t need them to perform this way and tapped off the retaining lips with a Craftright 1.35kg Club Hammer so the blocks could sit flat and flush.
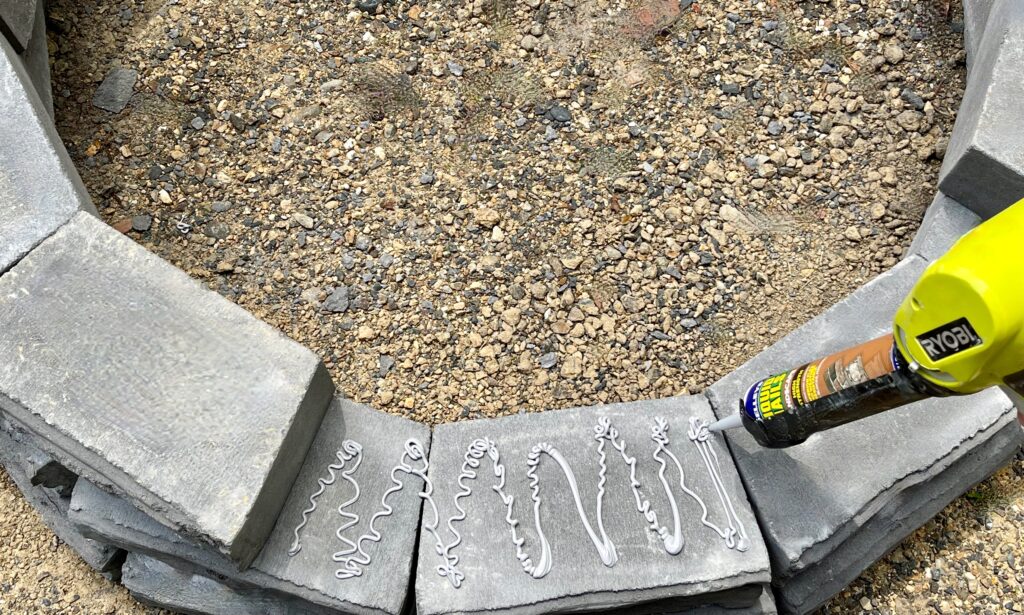
STEP 3
To make a fire pit safety surround, 14 blocks is the magic number for a circle with minimum gaps and an inner diameter of 1080mm. I skipped using concrete in favour of landscaping adhesive applied with a battery-operated caulking gun, and lay three courses in a stretcher bond pattern. An off-the-shelf metal fire pit bowl with feet is simply dropped into the centre.
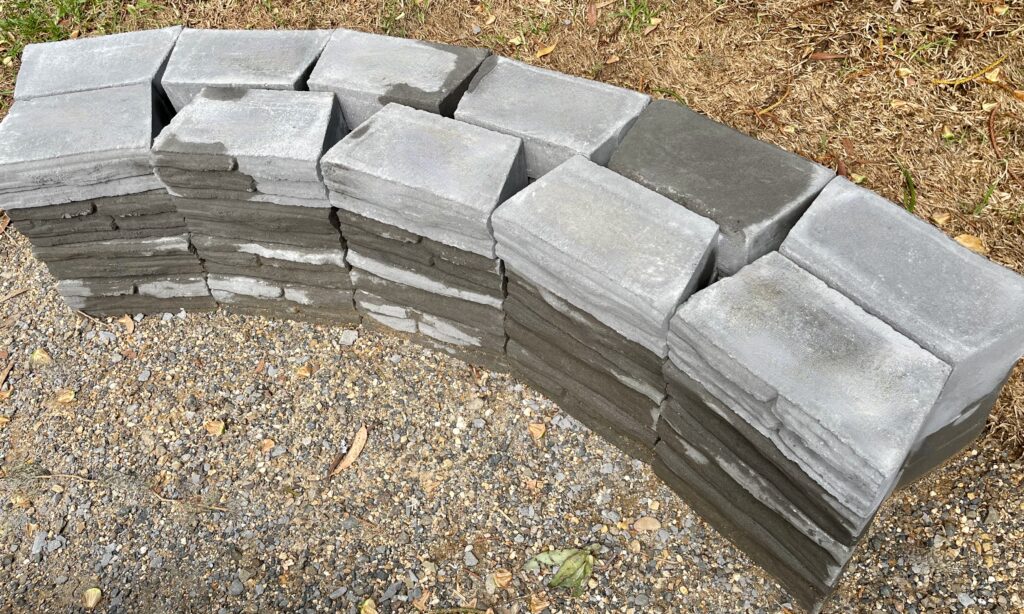
STEP4
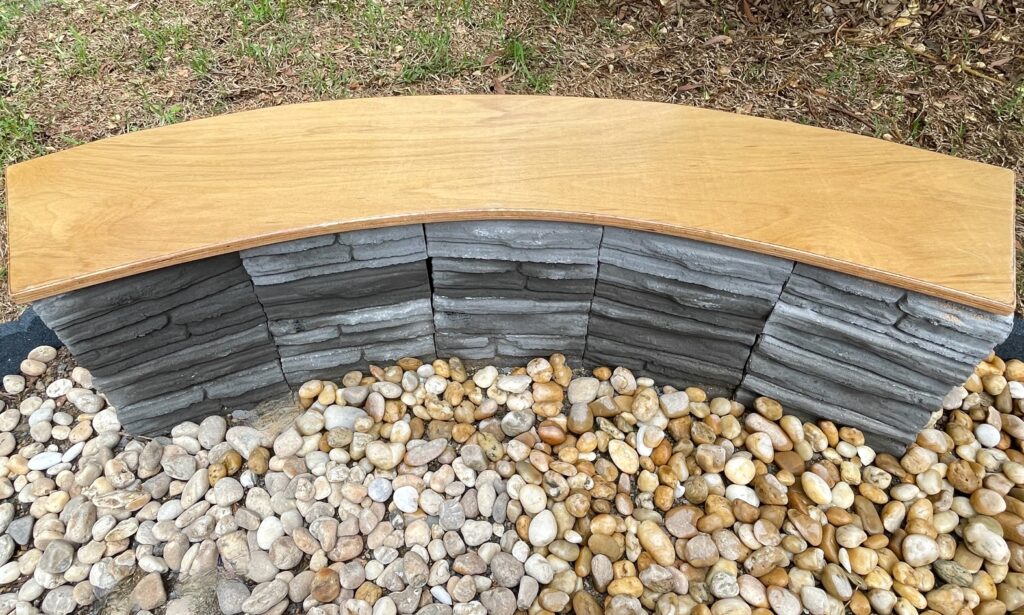
I used 44 blocks to build a two-seater bench, setting them out to match the curve of the road base circle, with six facing outwards and five facing inwards, using two 200mm x 100mm x 50mm pavers as spacers at the ends. For the second course, I set the back of the blocks 10mm in, over the spacers, then lay the third and fourth courses, applying adhesive between all joints.
TIP Build the base before finishing the rest of the zone so the edging can be installed around it.
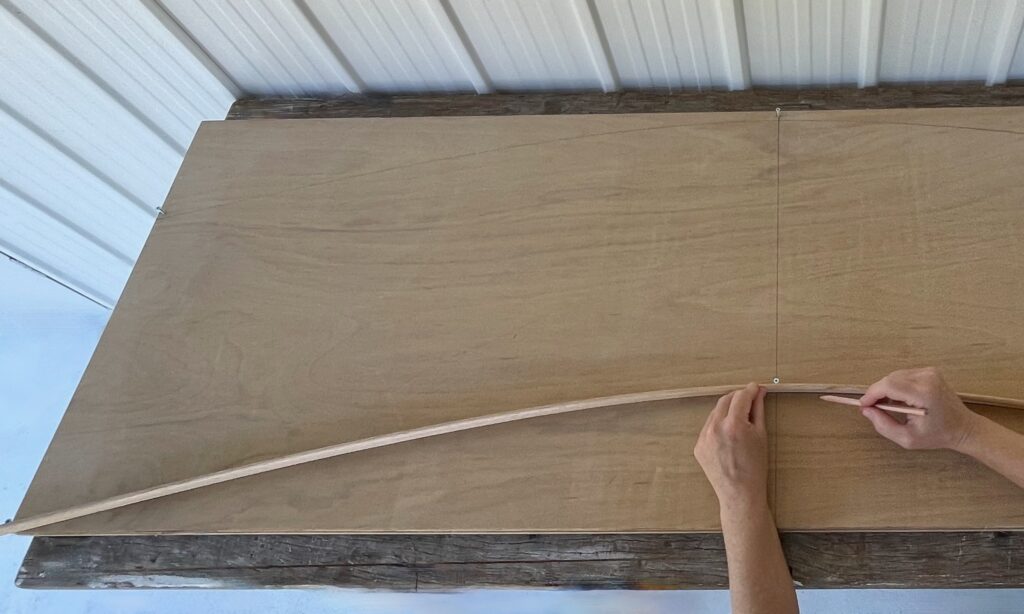
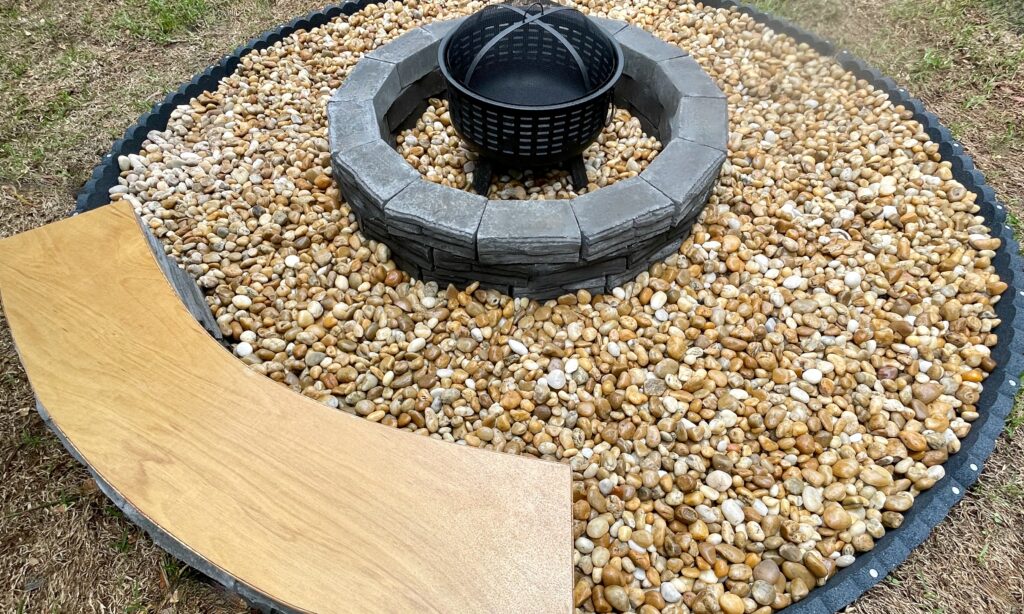
STEP 5
For a comfortable seat, and to add contrast with timber, I cut a sheet of 9mm marine plywood in half lengthways and glued it together with Bondall’s Bondcrete woodworking adhesive to make a 1800mm x 605mm x 18mm-thick panel.
To cut the curved edges, I installed screws and left them protruding halfway at 10mm and 420mm up from the base, and the centre 10mm and 420mm down from the top. Then I pushed a length of 20mm x 4mm coverstrip moulding against the screws to trace the curves and cut with a jigsaw.
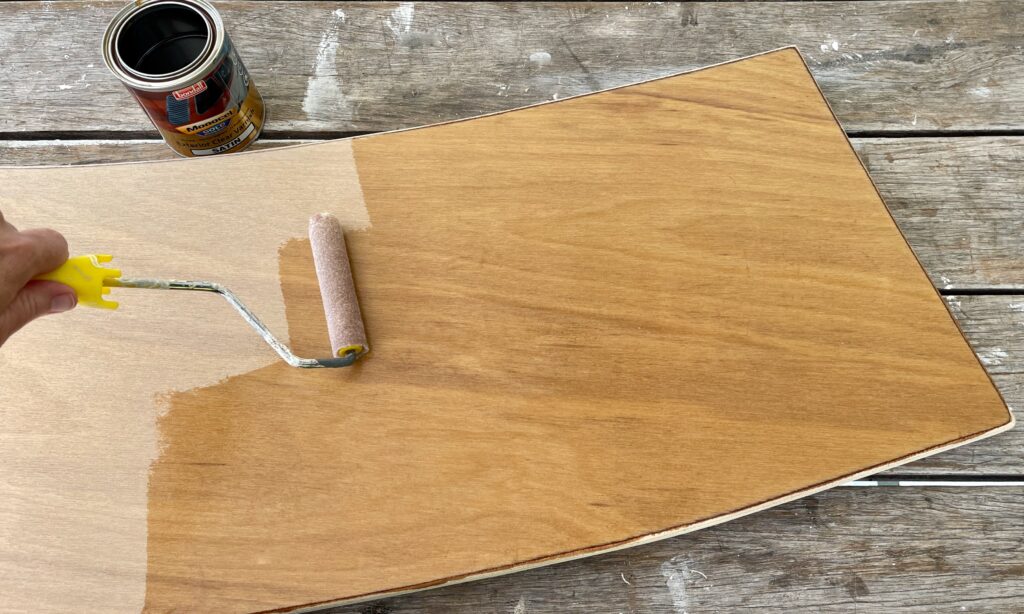
STEP 6
While test-fitting the seat on the bench I marked the corners on the underside of the panel to cut the ends with a jigsaw. (Using the actual bench as a template for shaping the ends will ensure the best fit.)
After rounding over the edges with a trimmer, I smoothed all over using a random orbital sander with 180-grit abrasive disc. Then I wiped away the dust and sealed both sides with three coats of marine-grade Monocel Gold Exterior in Clear using a mini mohair roller, ensuring the edges were well sealed for moisture protection.
STEP 7
To install the seat, I applied adhesive over the top of the blocks and dropped it into position, pushing down to hold it in place.
TIP It’s worth investing in marine-grade products for maximum weatherproofing of outdoor timber features.
STEP 8
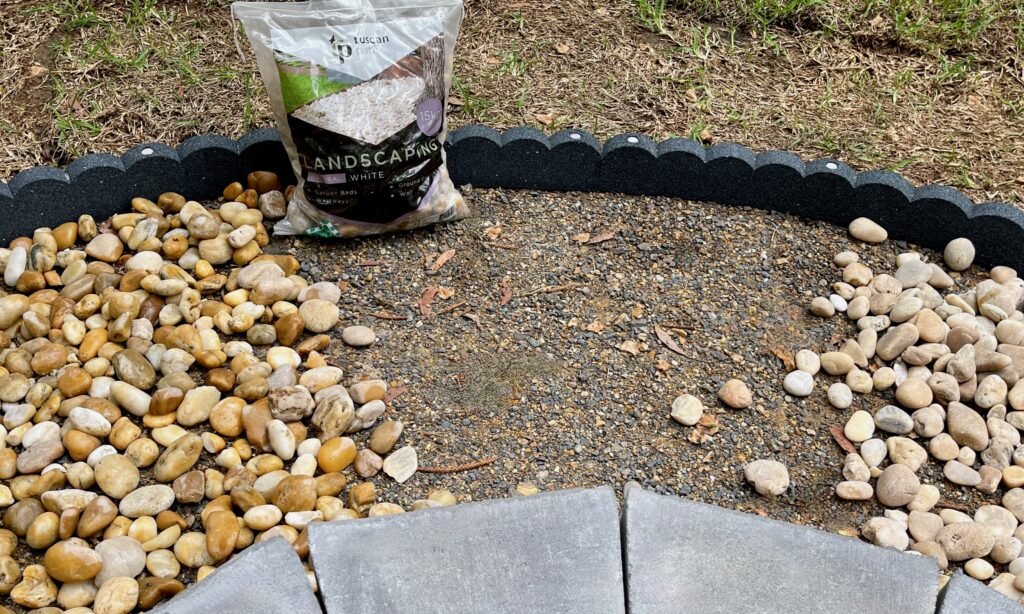
To mark out the zone, I installed scalloped garden edging made from flexible rubber that is simply bent to match the curve of the circle and covered the area with large 30-50mm white pebbles.
